Welcome to our comprehensive guide on how to properly pump your bike tire. Whether you’re a seasoned cyclist or a beginner, knowing how to inflate your bike tire correctly is essential for a smooth and safe ride. In this article, we will walk you through the essential steps to ensure your tires are properly inflated, allowing you to enjoy your cycling adventures to the fullest.
Nothing is more frustrating than a flat or underinflated bike tire slowing you down. By following our simple instructions, you’ll be back on the road in no time without any stress or hassle. So let’s dive in and learn how to pump your bike tire like a pro.
Key Takeaways:
- Having the right tools, including a proper bike pump and valve adapter, is crucial for successful tire inflation.
- Always check the manufacturer’s recommendations for your bike tire’s recommended pressure to ensure optimal performance.
- Locate the valve stem, remove the cap, and securely attach the pump to prevent any air leakage during inflation.
- Inflate the tire gradually, keeping an eye on the pressure gauge, and remove the pump once the recommended PSI is achieved.
- Double-check the tire pressure with a pressure gauge and make any necessary adjustments to reach the recommended PSI.
Gather Required Tools
Before you start, make sure you have the necessary tools. You will need a bike pump with the correct valve adapter that matches your bike tire’s valve type. Having the right equipment will make the tire pumping process much easier and ensure a proper inflation.
Here’s a breakdown of the essential tools you’ll need:
| Tools | Description |
|---|---|
| Bike pump | A handheld device designed specifically for inflating bike tires. There are various types of bike pumps available, such as floor pumps, mini pumps, and CO2 inflators. Choose one that suits your needs and preferences. |
| Valve adapter | A small attachment that connects the bike pump nozzle to the valve stem on your tire. Valve adapters come in different types, including Presta and Schrader, so it’s important to choose the correct one that matches your bike tire’s valve type. |
Having a reliable bike pump and the right valve adapter will ensure that you can effectively inflate your bike tire and maintain optimal tire pressure. Don’t forget to check the compatibility of your tools before starting the pumping process.
Check Tire Pressure Recommendation
When it comes to maintaining your bike, knowing the recommended tire pressure is crucial. This ensures optimal performance, stability, and safety while riding. To find the correct tire pressure for your bike, there are a couple of options:
- Check the sidewall of your tire: Many bike tires come with the recommended tire pressure printed on the sidewall. Look for the specific PSI (pounds per square inch) value indicated. It is usually followed by the manufacturer’s name or logo.
- Consult the manufacturer’s manual: If you don’t find the tire pressure information on the sidewall, refer to the manufacturer’s manual that came with your bike. Look for the tire pressure recommendation specific to your bike model.
It’s important to note that different types of bikes and riding conditions may have varying tire pressure recommendations. Road bikes, mountain bikes, and hybrid bikes, for example, often require different pressures to optimize their performance.
Pro Tip: Maintaining the correct tire pressure can prolong the lifespan of your bike tires, prevent flats, and ensure a comfortable ride.
Keep in mind that tire pressure can also be influenced by factors such as the rider’s weight, terrain, weather conditions, and personal preference. It may be worth experimenting with different pressures within the recommended range to find the sweet spot for your particular riding style.
Understanding PSI and Bar
When checking your tire pressure, you will often come across two units of measurement: PSI and Bar. PSI reflects the pressure in pounds per square inch, while Bar measures pressure in atmospheres. Here’s a quick conversion:
| PSI | Bar |
|---|---|
| 20 | 1.4 |
| 30 | 2.1 |
| 40 | 2.8 |
| 50 | 3.5 |
It’s important to keep your tire pressure within the recommended range to ensure optimal performance and avoid potential tire damage. Regularly check and adjust the tire pressure to maintain a smooth and safe riding experience.
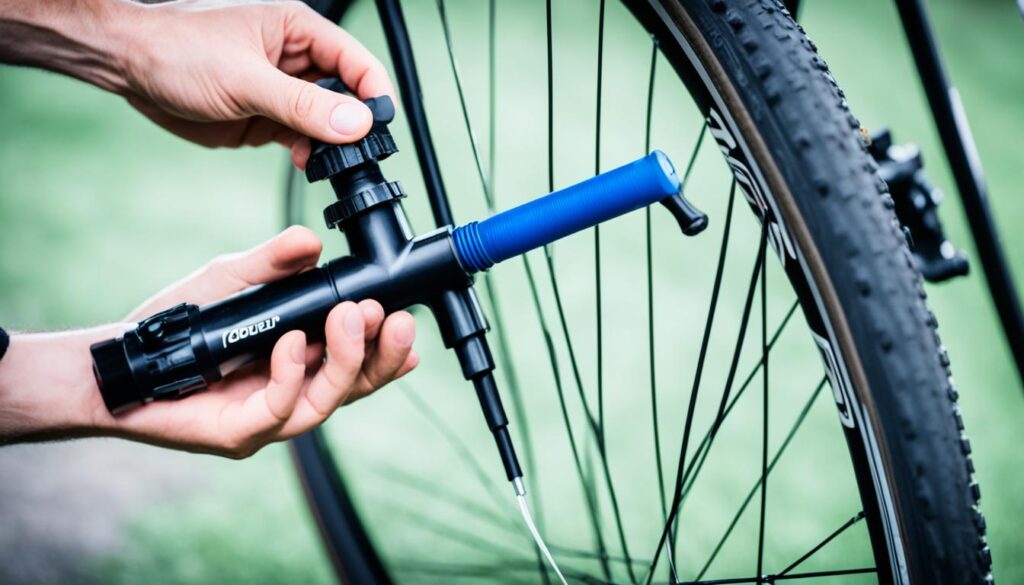
Locate Valve and Remove Cap
When it comes to pumping your bike tire, the first step is to locate the valve. The valve is usually located near the rim of the tire, and it is where you will attach the pump to inflate the tire. So, take a moment to find the valve on your bike tire.
Once you have located the valve, you need to remove the cap from the valve stem. The cap is a small protective cover that keeps dirt and debris out of the valve. It is essential to remove the cap before attaching the pump.
| Valve Types | Description |
|---|---|
| Schrader Valve | The most common valve type, found on most standard bike tires. It resembles a car tire valve and can be easily identified by its wider diameter. |
| Presta Valve | A narrower and longer valve commonly found on road bikes and high-performance tires. It has a threaded valve stem and requires a different pump adapter. |
| Dunlop Valve | Also known as a Woods Valve, it is similar to the Presta valve but has a wider base. It is commonly found on some European and city bikes. |
Now that you have removed the cap and familiarized yourself with the valve, you are ready to proceed to the next step: attaching the pump.
Attach Pump to Valve
Now that you have gathered all the necessary tools, it’s time to attach the pump to the valve. This step is crucial for a successful inflation process.
If your bike pump has a nozzle that directly fits onto the valve stem, simply align the two and push the nozzle firmly onto the valve. Make sure it is securely attached to prevent any air leakage during inflation.
However, if your bike pump requires a valve adapter, find the appropriate adapter that matches your bike tire’s valve type. Slightly screw the adapter onto the valve stem until it is securely in place.
Remember: The valve adapter acts as an intermediary between the pump and the valve, enabling a proper connection.
Once the pump nozzle or valve adapter is attached to the valve, you are ready to move on to the next step – inflating the tire.
“Properly attaching the pump to the valve is essential to prevent air leakage and ensure a successful inflation process.” – Bike Maintenance Expert

Valve Types and Corresponding Valve Adapters
| Valve Type | Valve Adapter |
|---|---|
| Schrader Valve | Schrader Valve Adapter |
| Presta Valve | Presta Valve Adapter |
| Dunlop Valve | Dunlop Valve Adapter |
Using the correct valve adapter is crucial to ensure a proper connection between the pump and the valve, as different valve types have distinct measurements and structures.
Inflate Tire
To properly inflate your bike tire, follow these simple steps:
- Position yourself next to the tire, with the pump handle or foot pump ready.
- Hold the pump handle with a firm grip, ensuring it is securely attached to the valve stem.
- Begin pumping air into the tire by pushing down on the pump handle or using a foot pump.
- Monitor the pressure gauge as you inflate the tire. This will help you reach the recommended PSI (pounds per square inch) for your specific bike tire.
- Continue pumping until you reach the desired pressure. Be careful not to overinflate the tire, as this can lead to reduced stability and possible tire damage.
Remember, proper tire inflation ensures a safe and comfortable ride. Keeping your tire at the recommended pressure helps prevent punctures, rollover resistance, and provides optimal grip on the road or trail.
Now that you know how to inflate your bike tire, let’s move on to the next step: removing the pump and securing the valve cap.
John’s Tip: Check the Tire Pressure Regularly
Checking your tire pressure regularly is essential for maintaining peak performance. You should aim to check your tire pressure at least once a week or before every ride. A pressure gauge is a handy tool to have in your bike maintenance kit, allowing you to quickly and easily monitor your tire pressure.
Remove Pump and Secure Valve Cap
Once you have successfully inflated your bike tire to the correct pressure, it’s time to remove the pump and secure the valve cap. Follow these simple steps:
- Remove the Pump: Gently pull the pump straight off the valve stem, ensuring a smooth disconnection. Take care not to accidentally release any air while removing the pump.
- Secure the Valve Cap: Immediately after removing the pump, place the valve cap back on the valve stem. The valve cap helps protect the valve from dirt, debris, and damage, ensuring its proper functioning in the long run.
By taking these two simple actions, you can ensure the safety and longevity of your bike’s valve and tire.
Remember, a secure valve cap prevents air leakage and keeps harmful substances out, maintaining the optimal performance of your bike tire. It’s an essential step in the pumping process that shouldn’t be overlooked.
Now that you’ve successfully completed the pumping process, your bike tire is ready to hit the road with confidence.

The image above illustrates the importance of securing the valve cap to protect your bike tire’s valve from dirt and debris.
Check Tire Pressure
Once you have inflated your bike tire, it’s crucial to double-check the tire pressure to ensure it’s at the recommended level. Checking the tire pressure regularly helps maintain optimal performance and safety during your rides.
Use a pressure gauge specifically designed for checking tire pressure. Insert the gauge into the valve stem, and read the pressure displayed on the gauge. Compare this reading to the recommended PSI (pounds per square inch) specified by the tire manufacturer or found on the sidewall of the tire.
If the tire pressure is below the recommended level, add air to the tire until you reach the proper PSI. Use a pump to gradually inflate the tire, periodically checking the pressure with the gauge. Remember to check the pressure in small increments to avoid overinflation.
If the tire pressure is above the recommended level, release some of the air by pressing the pin inside the valve stem with a small tool or by using a valve release button on the pump. Again, check the pressure intermittently to avoid releasing too much air.
Always ensure that the tire pressure is within the recommended range as inadequate pressure can lead to poor performance, decreased stability, and increased risk of flats or blowouts. Maintaining the correct tire pressure will enhance your riding experience and promote better handling on various terrains.
Conclusion
Now that you have learned how to properly pump your bike tire, you can enjoy a smooth and safe riding experience. By following these steps, you can maintain optimal tire pressure, which is crucial for efficient performance and durability. Regularly checking your tire pressure will ensure that you are always ready to hit the road.
Remember, a well-inflated tire provides better traction, control, and minimizes the risk of flats. It is essential to gather the necessary tools, such as a bike pump with the correct valve adapter, and to check the recommended tire pressure for your bike.
With these simple yet important steps, you can ensure that your bike tire is always ready to roll. Now, go ahead and put your newfound knowledge into practice for a fantastic cycling experience!
FAQ
How do I pump my bike tire?
To pump your bike tire, follow these steps: gather the required tools such as a bike pump and valve adapter, check the tire pressure recommendation, locate the valve and remove the cap, attach the pump to the valve, inflate the tire to the recommended PSI, remove the pump and secure the valve cap, and finally, double-check the tire pressure using a pressure gauge.
What tools do I need to pump my bike tire?
You will need a bike pump with the correct valve adapter that matches your bike tire’s valve type.
How do I find the recommended tire pressure for my bike?
To find the recommended tire pressure for your bike, check the sidewall of your tire or consult the manufacturer’s manual. Inflate the tire to the specified PSI (pounds per square inch).
Where is the valve located on my bike tire?
The valve is usually located near the rim of the bike tire. Look for a small protrusion and remove the cap from the valve stem.
How do I attach the pump to the valve?
Attach the bike pump’s nozzle or valve adapter securely to the valve stem to prevent any air leakage during inflation.
How do I inflate the bike tire?
Begin pumping air into the tire by pushing down on the pump handle or using a foot pump. Monitor the pressure gauge to ensure you reach the recommended PSI.
What should I do after inflating the tire?
After inflating the tire to the correct pressure, remove the pump by pulling it straight off the valve stem. Immediately secure the valve cap back on to protect the valve from dirt and debris.
How do I check the tire pressure?
Double check the tire pressure using a pressure gauge. If necessary, add or release air until you reach the recommended PSI.
What’s the importance of regularly checking tire pressure?
Regularly checking your bike tire pressure ensures optimal performance and a safe riding experience. It helps maintain the right balance and grip on the road.
source: https://bikesvibes.com/
enjoy our other articles